Are your Media Plan Campaign start Dates or End Dates flipping over to a US format?
In Australia (and a few other nations around the world) our language and date formats are set to Day-Month-Year. This is in contrast to Microsoft Global defaults where all dates are understood to be un US date format Month-Day-Year.
For organisations who wish to adopt a date format different to US Formats, perform the following steps to ensure both Advvy and your Excel media plans will understand the dates of your records the same way.
UPDATE ADVVY PERSONALISATION SETTINGS
In Advvy, change your date format in Personalisation Settings. For detailed steps on other personalisation settings click here: Getting Started: Personalisation Settings
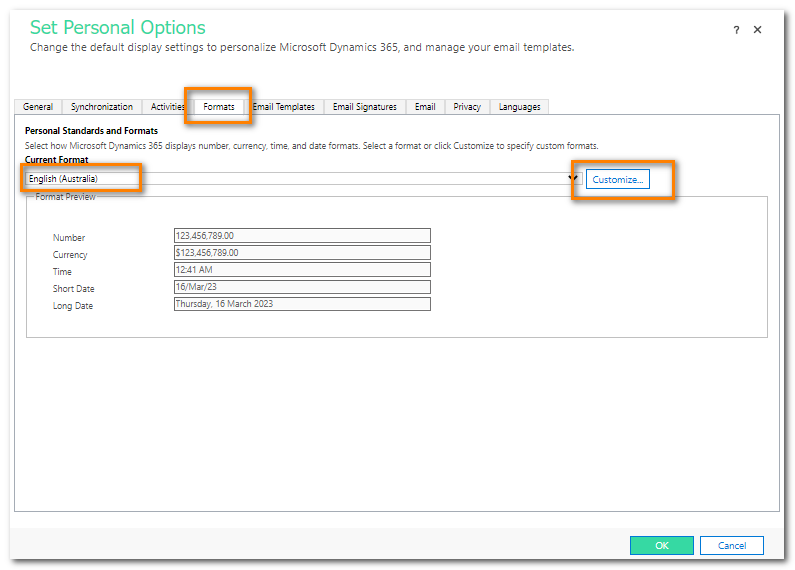
- In Advvy, on the Navigation bar, select the cog icon and choose Personalization Settings.
- On the Set Personal Options page, choose the FORMATS tab.
- On the Formats tab choose current format to be English (Australia) and then click [CUSTOMIZE].
- Select the Date Tab, choose the Short date format as dd/MMM/yy and select [APPLY]. Your date should show in the preview.
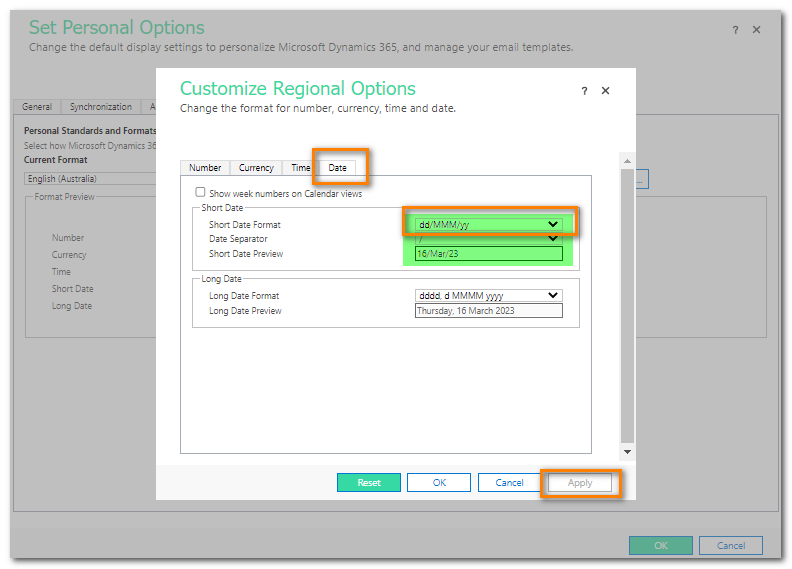
- Select OK to close and save this setting.
UPDATE EXCEL MEDIA PLAN – ADVVY DATA TAB
In Excel, the Advvy Data tab contains preformatted tables and fields. Some of these fields have a general format set when they were first created, however we usually expect most media plans end up having some cell formatting applied.
To ensure the cell formatting is set correctly for the media plan, we need to ensure two cells (at the very least) are set correctly.
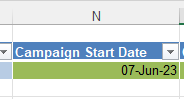
- Open your Excel media plan and navigate to the Advvy Data tab.
- In the top table, click on the cell under the field called Campaign Start Date.
- In the Excel ribbon, select the Number format to be “General” and then click onto another cell- this should clear any existing formatting from the cell.
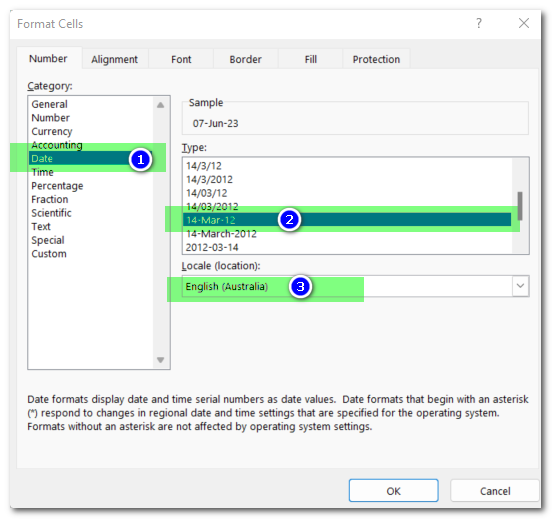
- Now, click on the cell under the field called Campaign Start Date again, and this time, open the Number formats drop down.
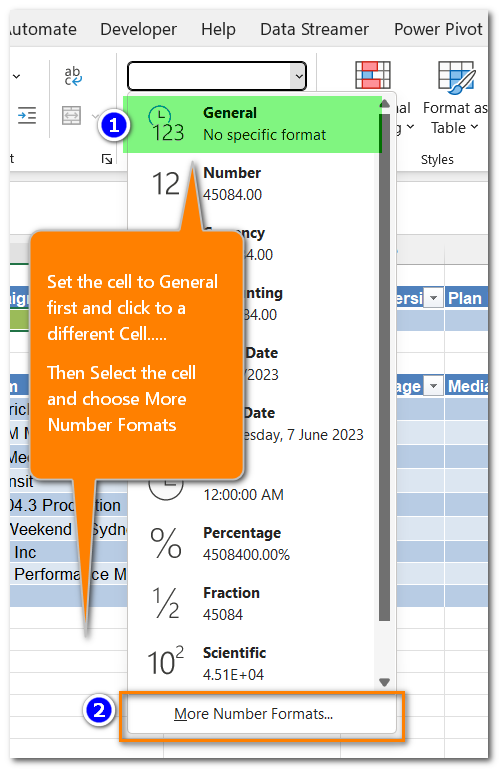
- Select ‘More Number Formats’.
- Select Date – and choose the format Type 14-Mar-12 ie dd-MMM-yy as the format, and choose the Locale to be English (Australia)
- Select OK to set this a the cell format.
- Repeat all of these steps for the cell under the Campaign End Date field.
- Repeat all of these steps for the Media Flighting Table date cells for Start Date and End Date.

Update your Advvy-Add-in (if it was Side-loaded)
If your organisation has provided the Advvy-Addin for Excel through it’ Microsoft managed policies, then your Add-in will be up-to-date overnight.
However, some organisations have provided the Advvy Add-in as a “side-loaded’ Add-in, meaning each user can add or remove it from excel themselves.
In these organisations, users can wait for 4-7days for the Microsoft Office 365 Cache to be cleared and updated or you can perform the steps below to immediately install the Add-in yourselves. The steps are to reset the Office cache via Excel options, then reinstall the latest Advvy-Addin from the Microsoft Store.
- Open Microsoft Excel and navigate to the File menu
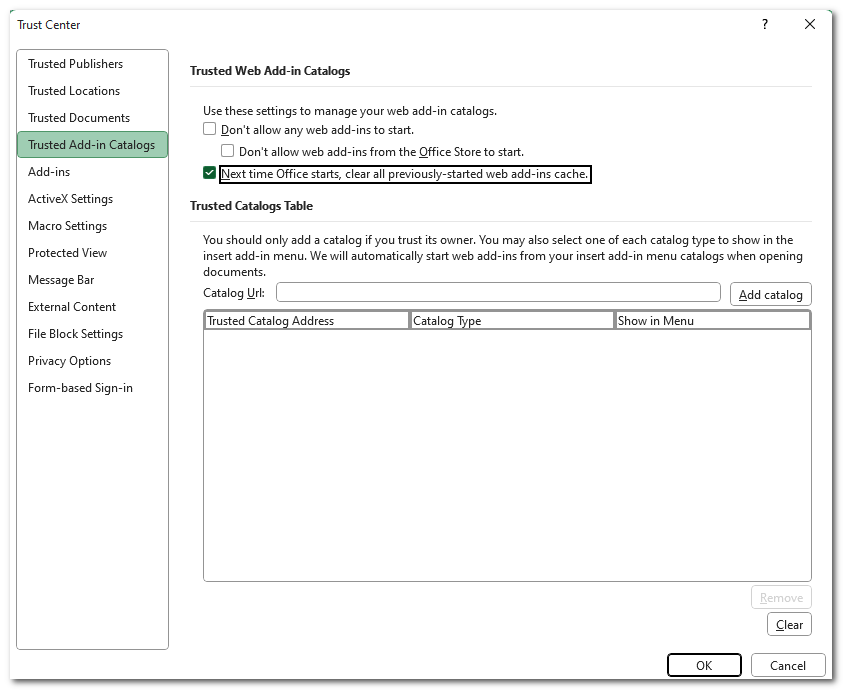
- Select File > Options > Trust Center > Trust Center Settings > Trusted Add-in Catalogs.
- Select the checkbox “Next time Office Starts, Clear all previously-started web add-ins cache“.
- Exit/Close Excel.
- Re start Excel – The next time you launch excel it will clear the cache and may remove the Advvy add-in.
- Navigate to the Insert menu and select Insert > Get Add-ins > Store> and search for the Advvy Add-in App.
- Select ADD to add the app to Excel.
By performing these steps, you can be assured to have the correct date formats being brought into excel as well as being pushed into Advvy during a sync.