This is the new guide for managing a workflow on a record.
Workflow Activities Tab
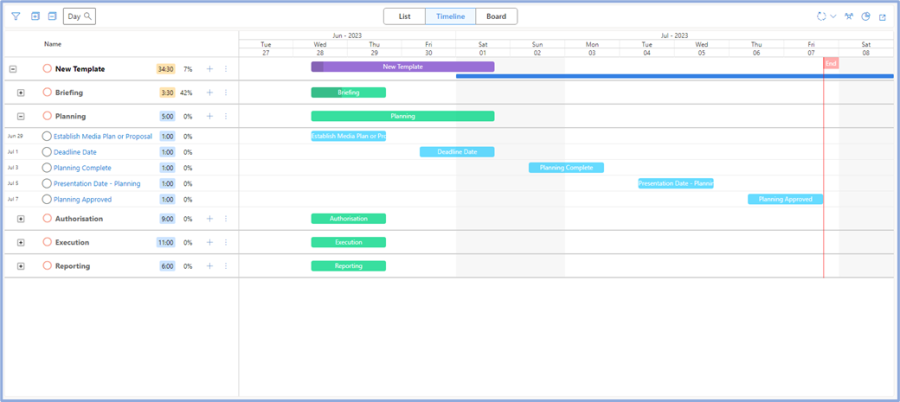
- The main way to manage a workflow is from the Workflow Activities tab of the relevant record. This gives you three different views of the workflow and its stages and activities as well as features to manage you workflow.
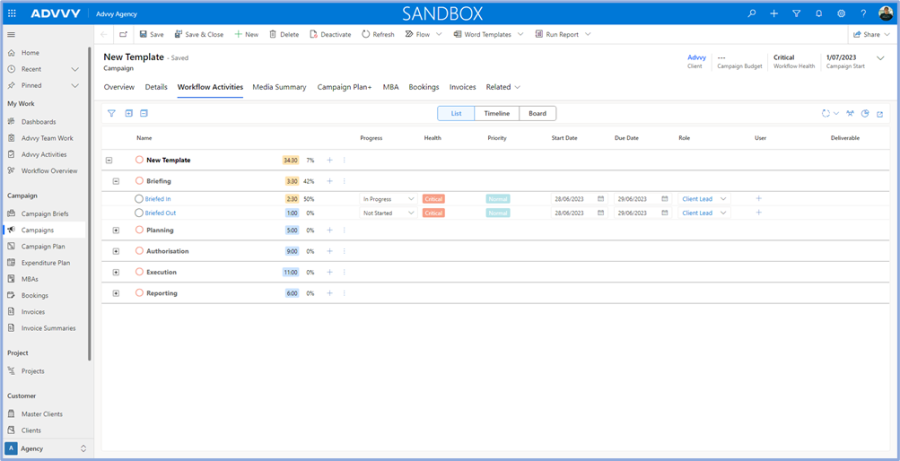
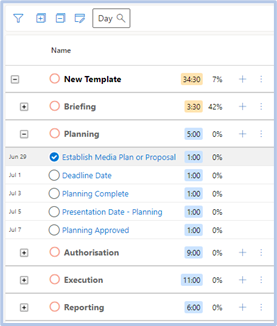
- The 3 views available from the Workflow Activities tab to enable management of a workflow are: List, Timeline and Board. The first is the List view, which gives an overview of an activities’ details, including the ability to directly edit the Progress, Start & Due Dates, Role, User in addition to the Name, Effort and Completion which are also editable from the Timeline
Managing Activities on a Workflow
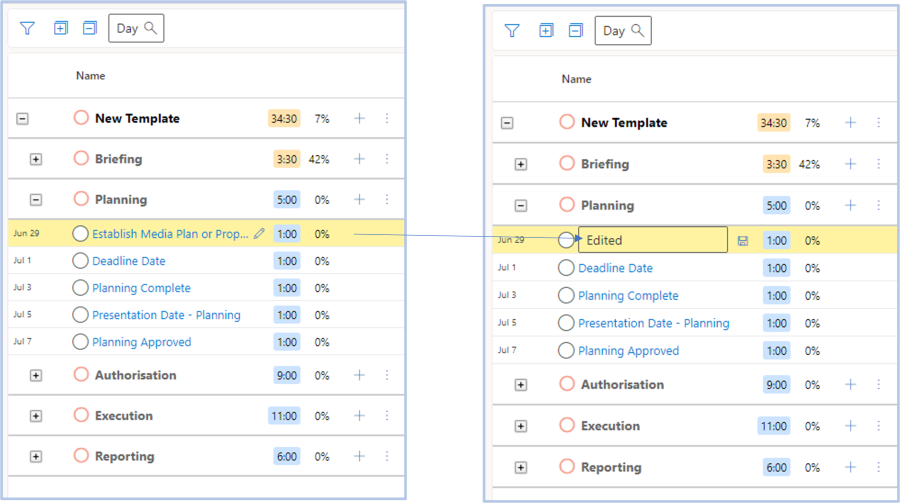
- Activity Name can be edited from the List or Timeline views by hovering, then clicking edit, when finished editing save back the changes with the save button to complete. The Name is also a hyperlink to open the activity form, allowing you to edit all fields of an activity.
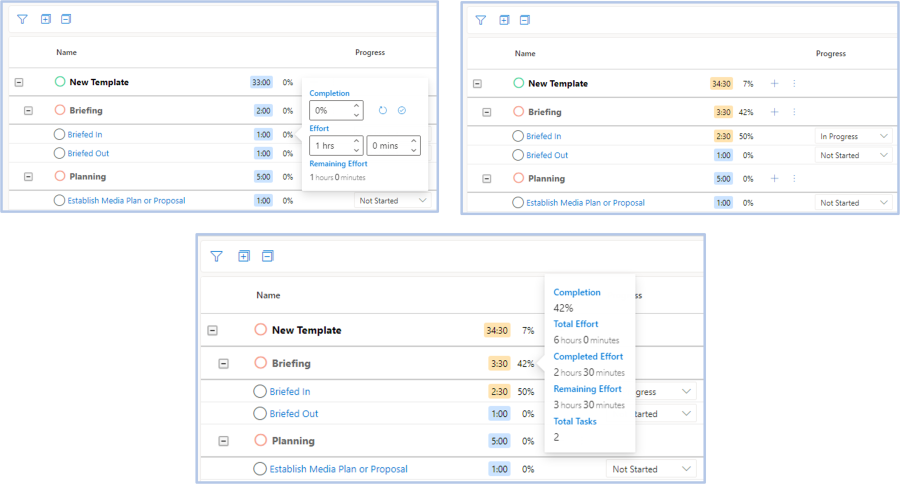
- Effort and Completion can be updated for an activity by clicking on the visible values and modifying them in the pop out. This then updates stage and workflow totals when changed. You can drill further into workflow and stage Effort and Completion Totals by selecting the same visible values at their levels and showing you totals of Completion, Effort, Completed Effort, Remaining Effort and No. Activities
- Selection of activities can be made per activity via the circle selectors or with ctrl + left click or with shift + left click to select from a start to end activity and all in between that range.
- After selecting multiple activities bulk editing options become available from the menu bar.

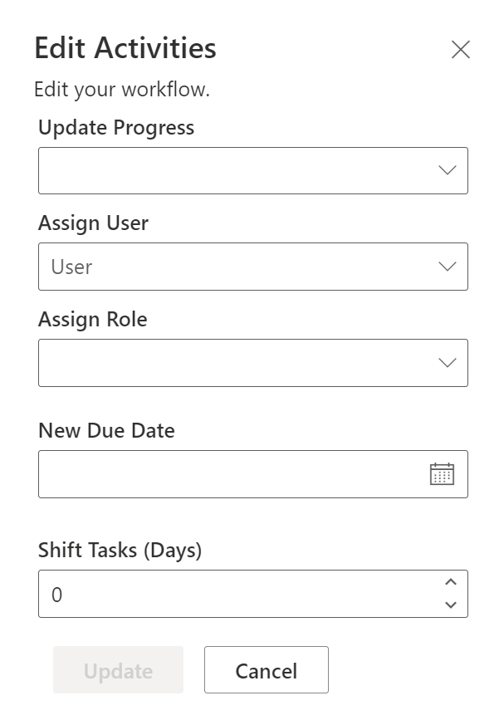
The first button allows you to Bulk Edit values of activities – Progress, User, Role, Start/Due Dates.
- The second button allows you to create bulk dependency/blocking links by the current sort order of the activities. Please note that blocked activities cannot have their progress edited either in bulk or individually and role locked activities cannot have their role edited.
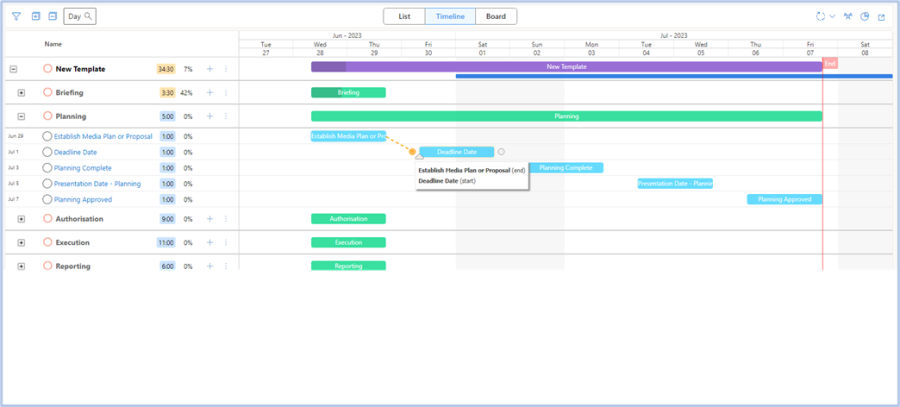
- From the Timeline you can also create individual dependency/blocking links by selecting and dragging from the end node of a starting Activity to the first node of a target Activity. This will cause the target activity to be Blocked.
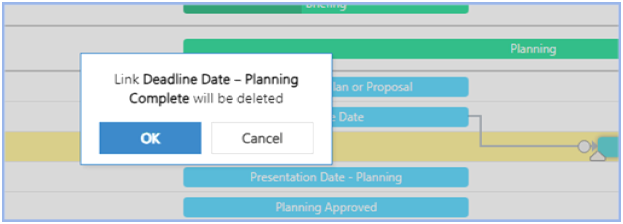
- To delete unwanted dependency/blocking links in the Timeline view you can double click on the link and select ‘OK’ from the modal.
- Additional action buttons
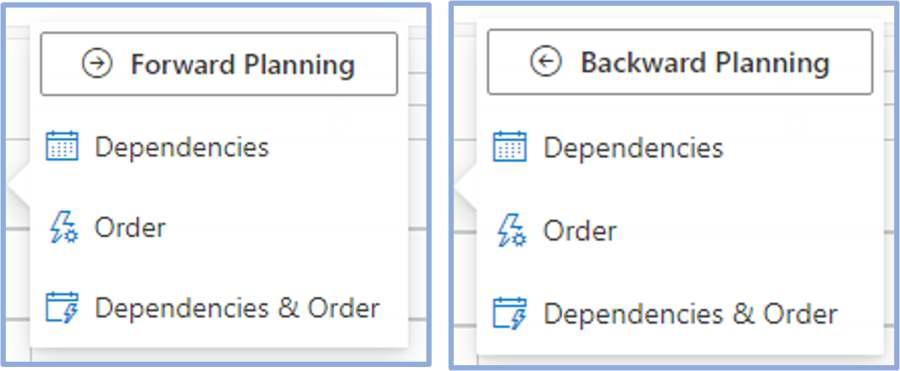
 available on the List and Timeline views allow you to Create Stages and Activities or Auto-Schedule the activities in a stage or the entire workflow. The auto-scheduling options are better used when in Timeline view and give users the option to Forward or Backward plan from the first or last task of the selected level (i.e. workflow/stage).
- Example – Forward Planning a Stage by Order results in Activities being evenly paced from the first activity in the stage.
- Example – Forward Planning a Stage by Order results in Activities being evenly paced from the first activity in the stage.
- For a more complex Auto-Scheduling option you can use existing Dependencies between activities. Auto-scheduling the activites by Dependencies causes them to be paced only where an existing dependency/blocking link exists and does not impact other activities. Finally you can auto-schedule by Dependencies and Order which is a combination that preferences dependencies, if they exist, over the order of activities.
- The Timeline view also allows you to drag single or multiple activities to update their Start/End Dates or their Progress (progress can be modified provided they are not blocked).
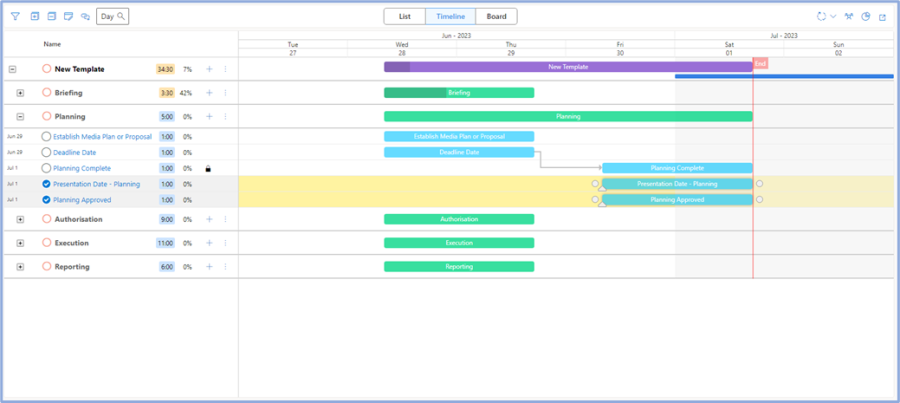
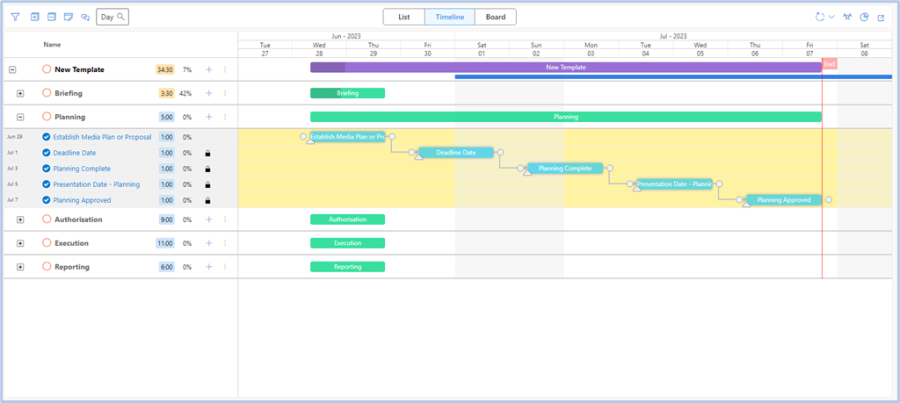
- A lock
 indicates that an activity has a dependency and is blocked. When the blocking activity has been completed the blocked activities Progress or Completion % can be edited by dragging the progress marker.
 - Additional options from the header bar allow a user to:
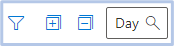
- Filter activites by User, Progress and/or Role.
- Expand all levels (please note that by default when the workflow loads the first active stage is expanded)
- Collapse all levels
- Scale the timeline between Day, Week, Month or Year –
- The Board view is more focused in its functionality allowing users to quickly drag activities from one Progress lane to the next to update their Progress. Multiple ac
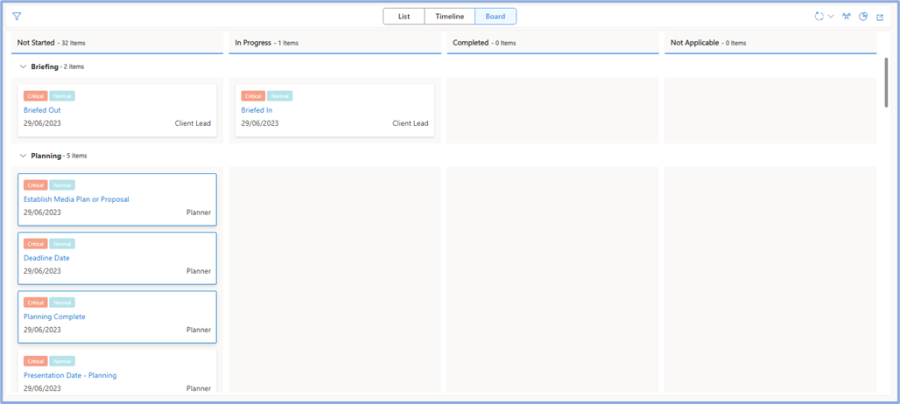 tivities can be moved by using ctrl + left click while selecting.
Workflow Options
- There are a number of options availabe for workflows –
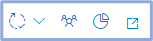 these options are:
- Workflow allocations, adjustments and options (please note that most of the allocation and adjustment options require a template and some options are restricted to workflow administrators)
- Workflow role assignments
- Summary statistics; and
- Expand
- Workflow Allocation options include:
- Update Team Members – This option updates the workflows available team members based on their roles. When a workflow is created from a template it decides the most relevant members for the team. If these roles change then the team needs to be updated. The team can also be manually reduced and updating the team members will add these removed user/role assignments to the workflow again.
- Auto Assign – This option finds unassigned tasks in a workflow and assigns them to available team members based on a user’s roles and specialties and the templates.
- Copy Assignments – This option finds workflows using the same template and copies their assigned users.
- Workflow Adjustment options include :
- Optional Stages – If a workflow was created from a template with stages set as optional you can add these from the modal supplied.
- Update Dates – If a workflow was created from a template its start and end dates can be updated if the start and end of the entire project/campaign changes. This will follow the calculation logic supplied on the template.
- Specialty Activities – Add or remove activities based on the records current selected requirements.
- Workflow Options options include (see further – How to create a workflow for a Campaign OR Project):
- New Workflow – delete an existing workflow and create from scratch.
- Update Workflow – create a new workflow from an existing template.
- Save Workflow – save the workflow as it currently is as a new template.
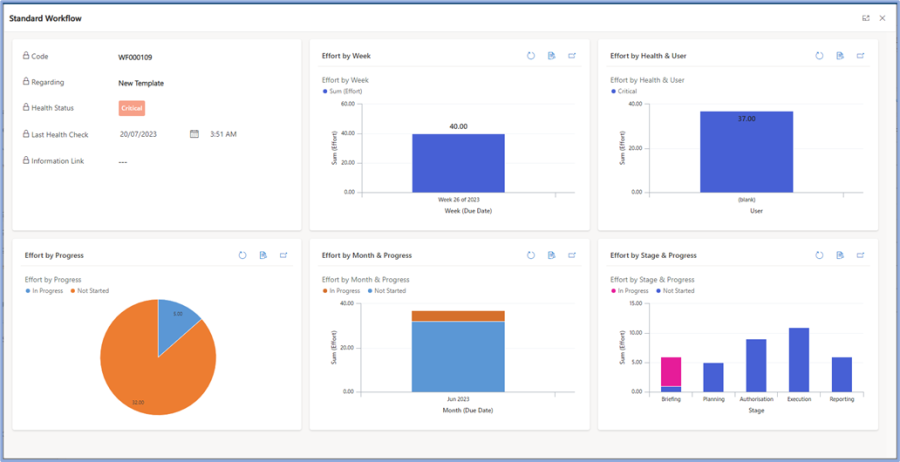
- Summary Statistics provide an overview of the Effort and Progress of the entire workflow broken down by dimensions such as time, stage and user.