Setting up your Master Data
For Admins or Users with Extended User access
Master Data is all of the reference data that is contained within Advvy that is used throughout the system.
Rules about Master Data
- All Master Data need to have unique “names”. The system will generate unique codes upon creation, but administrators must ensure the naming conventions within each type of Master Data is unique. If there are duplicate named items within the Master Data, users and the system may return errors when trying to find matches or links to the correct data entry.
- There is no limit to the number of entries you can store within Advvy.
- There is an order to the way Master data records are set up to ensure that lists that tie other lists are populated – for example Mediums have references to Markets, Media Types, Media Sub Types and Networks, meaning all of these other sets of data should be created first.
- Not all Master data entities needs to be populated in order for Advvy to be effective.
- Adding master data can be performed manually in the system by selecting the +New button on the ribbon or Advvy can supply import templates that can be used to bulk upload your master data.
The most important master data that needs to be added to Advvy before your users can start to work with it include:
- Market
- Media Type – Media Type Group, Media type Segment, Media Type
- Media Sub-Type
- Clients
- Networks – Publishers, Advertisers etc
- Mediums
A full list of the Order of creation/import is outlined at the end of this article.
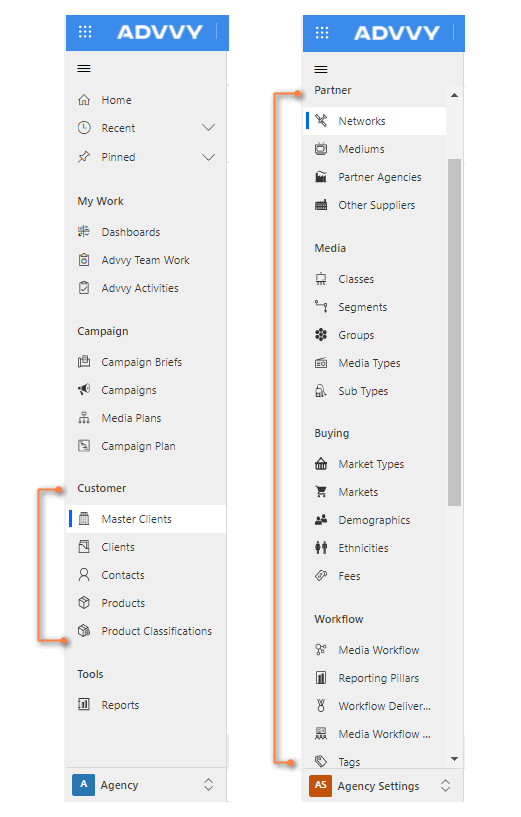
Where is Master Data Located?
Most Master Data is managed in Agency Settings area, but there are additional master data lists managed in the main Advvy area.
How to Add Master Data
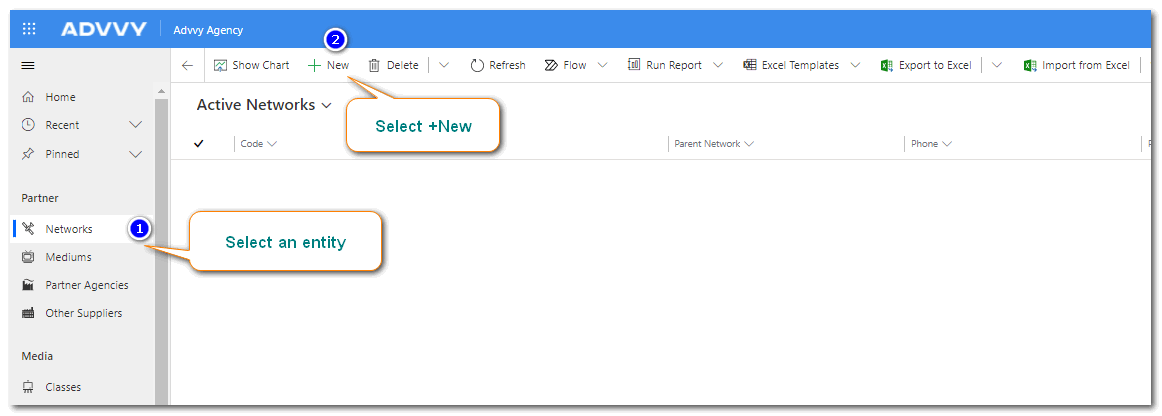
Follow these steps to add a new record to your Master Data entity.
- Navigate to the Agency Settings Area. For this example select Network.
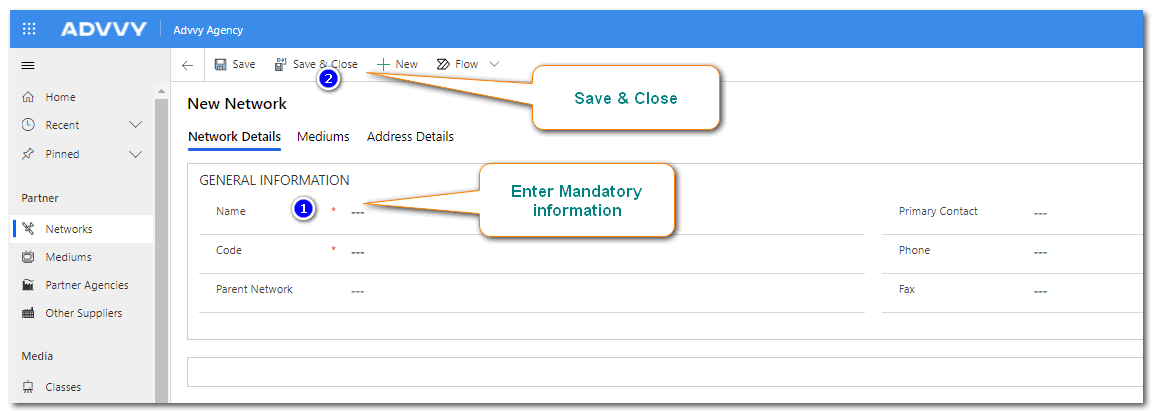
- On the ribbon at the top of the screen select +New. A form displays with relevant fields.
- Enter the information on the displayed form, and select Save & Close on the ribbon.
- The new entry is displayed in the view list.
This process can be followed to manually add entries for all of your master data entities.
How to Add Master Data in Bulk
Advvy provides a set of excel workbooks where admins can populate all of the master data on the sheet and this can be bulk imported into Advvy.
The excel file for importing must be saved as a .CSV file format.
The Advvy team can assist with the bulk importing of Master Data for all new instances of Advvy.
Contact our Support team and we will send you the latest templates for bulk importing master data into Advvy.
Another quick and efficient way to BULK Import Master data is to:
1. Create One NEW record manually and save it.
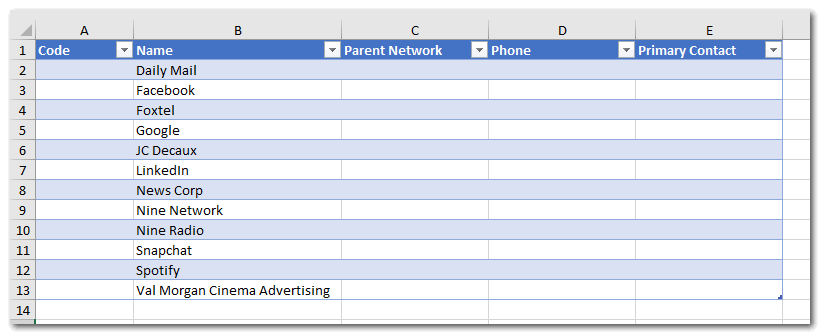
2. View the entity list with that one item, and on the ribbon, select “Export to Excel” – this creates a downloaded Excel file.
3. Edit the Excel download file and add more entries into the table below.
4. Return to Advvy, and on the ribbon select “Import From Excel” – then select the updated import file.
Your data will be bulk imported – Refresh the screen to see new entries.
NOTE: You need to ensure there are NO duplicate entries, and that all data that references OTHER master data already exists in Advvy.
If you follow the order of creation below you’ll be able to set-up your data very quickly.
Click here for more information about editing, deactivating, deleting and exporting Master Data.
Master Data – Order of Creation
This list outlines the recommended order to add Master Data into Advvy either the first time, or when importing in bulk.
Master Data Entity |
Data Fields |
| 0- a1a_autoname | Entity Name |
| 0-a1a_autonumber | Name, Auto-Number, Auto-Number Text, Auto/Manual, Code Field, Entity Name, Last Automatic Code, Last Generated Number, Leading Zero, Lock Helper, Next Automatic Code, Prefix, Trimmed Auto-Number |
| 1-Agency Types | Name |
| 1-Audiences | Code, Name, Demographics Count |
| 1-Client Type | Name, Code |
| 1-Contact Type | Name |
| 1-Countries | Name |
| 1-Ethnicities | Name |
| 1-Fees | Name |
| 1-Market Type | Code, Name, Market Type Count |
| 1-Media Workflow Reporting Pillar | Reporting Pillar, Sort Order, Colour, Workflow Type |
| 1-Media Workflow Role | Name |
| 1-Tag | Name, Parent Tag |
| 2-Contact | Full Name, First Name, Middle Name, Last Name, Business Phone, Email, Mobile Phone, Portal User, Portal Visibility, User Name |
| 2-Market | Market Type, Name, Edit Fields, Market Count |
| 2-Media Type Class | Name |
| 3-Media Type Segment | Name, Media Type Class |
| 3-Media Type Group | Name |
| 4-Media Type | Name, Code, Media Type Segment, Media Type Group, Colour, Sort Order |
| 5-Media Sub Type | Code, Name, Media Type |
| 6-Master Client | Name, Agency, is parent, Parent Master Client |
| 6-Network | Name, Code, Parent Network, Primary Contact, Phone, Fax |
| 7-Client (Account) | Account Name Primary Contact Main Phone Address1: Country Address2: Country Agency Branch Client Type Code Master Client Same as Office Address |
| 7-Medium | Code, Name, Market, Media Type, Media Sub Type, Network |
| 8-Product Classification | Name, Client |
| 9-Product | Name, Client, Primary Contact, Product Classification, Product Description, Reference Name |
Previous article: 2 Setting up your Hierarchy Next article: 4 Setting up a Workflow Structure