Custom Campaign Views
Advvy gives users a variety of ways they can filter data inside the tool. In the Campaigns section, it’s possible to create a custom view that only displays campaigns from a specific client with additional fields as well. This is very useful for users who manage multiple clients, as it will greatly reduce the amount of campaigns displayed in the campaigns section. Keep in mind, there are a variety of system views already available in Advvy that users should explore.
Creating a campaign-specific view in the Campaigns section of Advvy
- Navigate to the Campaigns Entity – it displays the default view of Active Campaigns
- Click on the Edit Filters icon (right of screen) – this will open up the filter that is applied to this View.
From here you can add more filter criteria to display the specific campaigns you need.
In this example, we want to see all Campaigns for the clients called Acrylics and Acrylic Spice
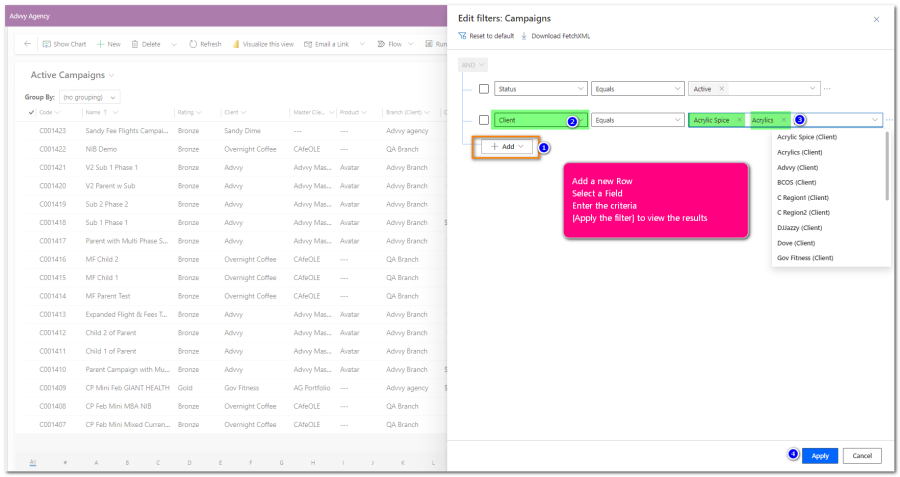
- In the Edit filters: Campaign panel, click on [+Add] and add a new Row
- For the row select the ‘Client’ field then select ‘Equals’ then click in the criteria field and it will display a list of Clients – select one client to add to the criteria, then click again to select the next client… you can add as many records here as you like.
Once your Filter is set, click on Apply, and it will display the results of the filter criteria you selected.
At this stage, the view hasn’t been saved – it’s only an adjustment to the current View.
To Save this as a new view,
- Click on the Heading to view a list of views and options
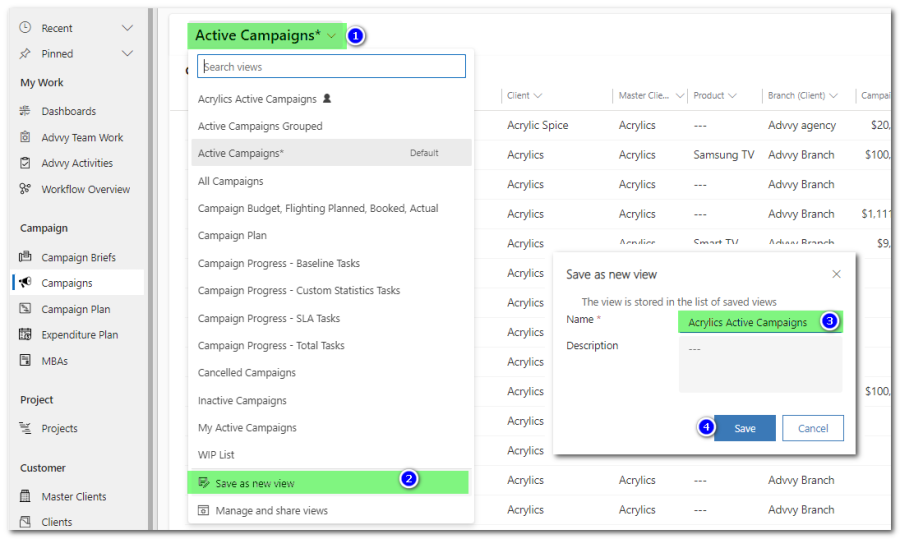
- Select [Save as new view] and enter a name for this new view and click [Save]
- The view is now Saved and the New view name is displayed at the top.
At this point, this View is just for YOU. It’s a personal view. If you want to share this view you can do this by following this How-To guide.
TIPS
- You can set any view as the default view for each entity by selecting the view heading and setting it as Default.
- You can add grouping to your view to look at multiple criteria in different ways
- You can share your views with your team
- You can edit the columns as well (add new fields, reorder existing fields, remove fields) before saving your view
- You can edit your view and Save
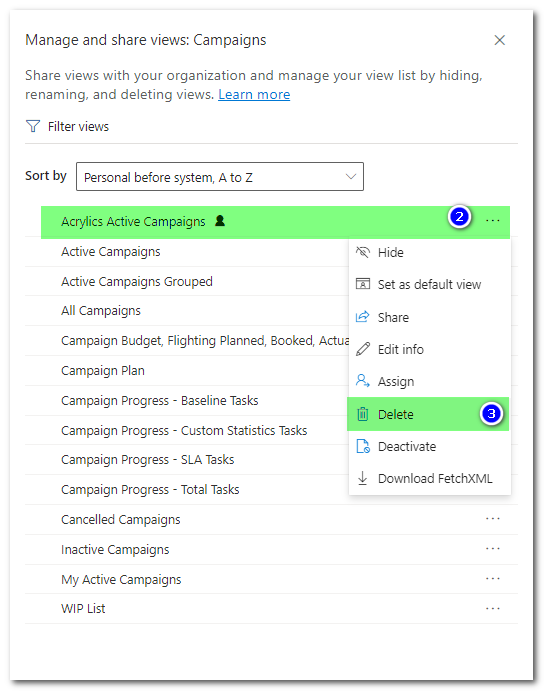
Deleting a saved view
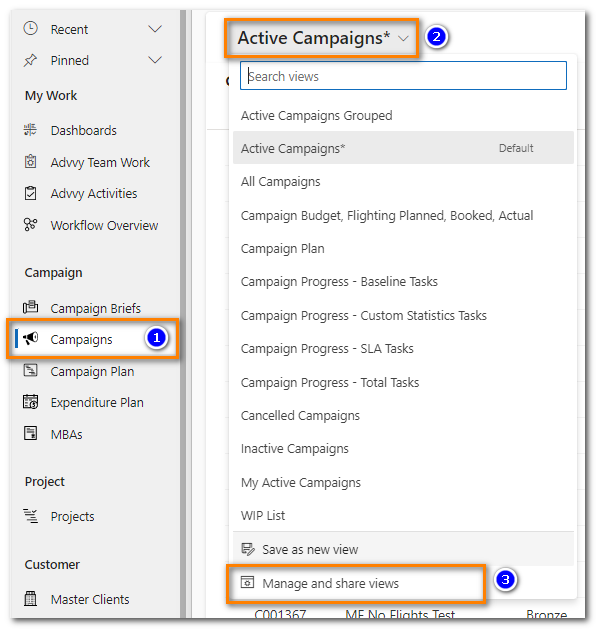
- Navigate to the Campaigns section in Advvy
- Click on the Heading of the View to display all views and functions
- Select [Manage and Share views] to display a side panel of views
- In the pop up, Find the View you want to delete and click on the ellipsis (three dots …) to view more commands
- Select [Delete] and confirm the [Delete]
- Your view should be removed