FOR ADMINISTRATORS ONLY
Importing Master Data can be a simple process where a bulk upload of records can be imported into the existing Advvy data tables.
In most cases, the Master data in Advvy can be extracted into an excel file, updated in excel and re-imported back into Advvy.
These file formats are supported:
- Excel workbook (.xlsx)
- Comma-separated values (.csv)
- XML Spreadsheet 2003 (.xml)
The maximum file size allowed is 8 MB.
Reasons to use Import
- the need to create a significant amount of new records at one time, rather than selecting “+New” and adding them one by one
- the need to update existing records in bulk ie change the status of a group of records from ‘Active” to “Inactive”, or change a category of a group of records
Master Data imports affect the entire system and should only be performed by Administrators or Data managers for your organisation.
Basic Import Rules
You can only import one file at a time.
Table data that have related fields from another table will need to be imported in the correct order.
All existing Master Data has hidden ID fields and checksum fields that are used by the system to identify the record- maintaining these hidden IDs is essential to the system operation.
Every table has required columns that must exist in your input file.
It’s recommended that you download an Excel template, add your data, and then import the file to your app. The template saves time and effort. Don’t add or modify columns in the template to avoid issues during the import.
Before you import a file make sure the column headings match the table names in Advvy. During the import process, the system will try to map the table names from your input file to the table names in the app. If they don’t match, then you’ll have to manually map the fields or you may run into issues during the import process.
If you want to make changes to existing data
a) download the data template as xlsx
b) in Excel, prepare your import file by updating the records and save as xlsx
c) In Advvy, Import the file
If you want to add new data to an existing set
a) download the data template in xlsx,
b) clear any existing records and leave just the first row of fields (optional)
c) clear hidden columns A,B,C (optional)
d) add new entries into the file and save in Excel
e) In Advvy, Import the file
Exporting a Data Template for Import
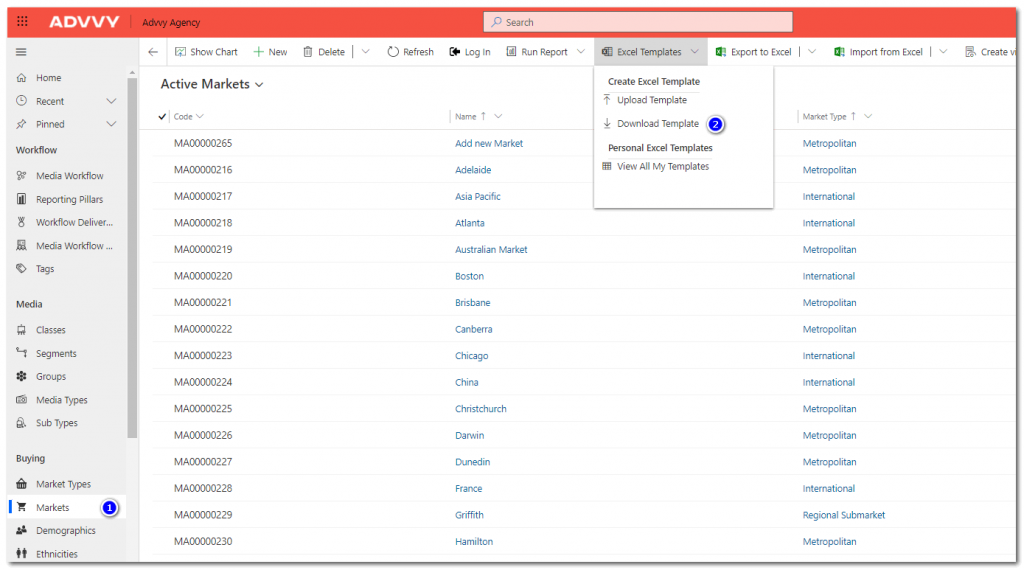
1 Navigate to Advvy Settings and select the Master Data entity you want to export eg “Markets”.
2 Select [Excel Templates] on the ribbon and select “Download Template” – a popup displays with the Entity and options for View records (select ‘Active’ to edit current records).
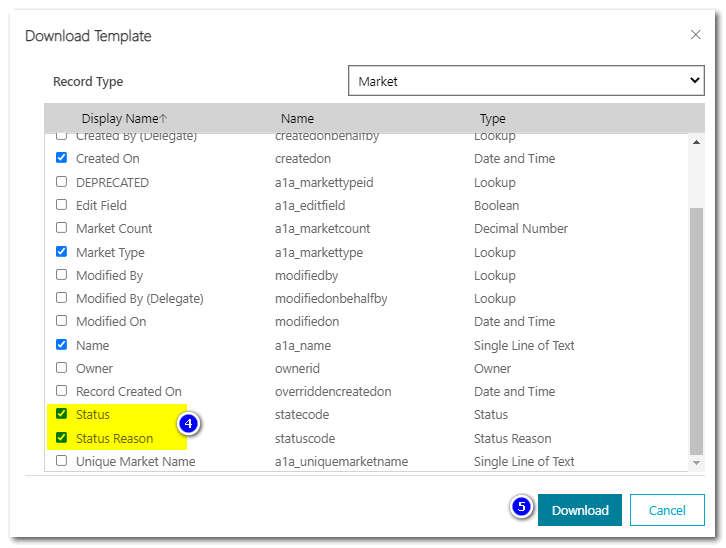
3 Select [Edit Columns] to display the list of available fields related to the entity.
4 If you want to change the status of records, ensure you add Status and Status Reason to the template.
5 Select [Download] to generate and Excel file extract with the relevant entity columns.
The template is now ready for editing.

Preparing your Import File
The Import file contains a list of the records matching the view criteria you selected and any additional Advvy fields.
It also contains 3 hidden columns of reference data that should not be edited – these are columns A, B and C.
To prepare your import file, consider the existing set of records and make any edits as required. For example, you can rename the records in the file (ensure no duplicates), you can also disable records by marking them “Inactive”.
If you want to add new entries simply add the new records to the bottom of the table and fill in as much information as possible.
If there are records that have not been edited they can stay in the file – they wont be reflected in the import count.
Save the Excel file. The template is ready for Import.
Importing the file
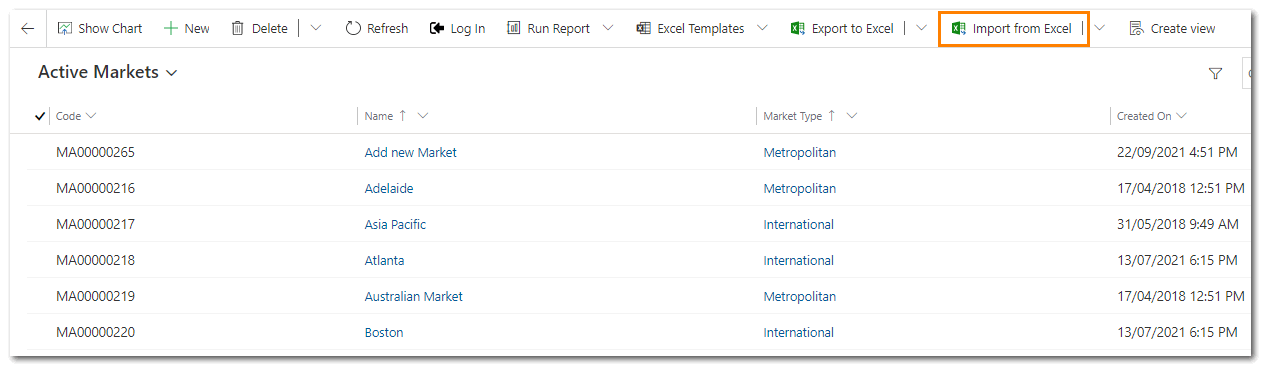
1 Navigate to the Master Data entity you want to import to eg “Markets”.
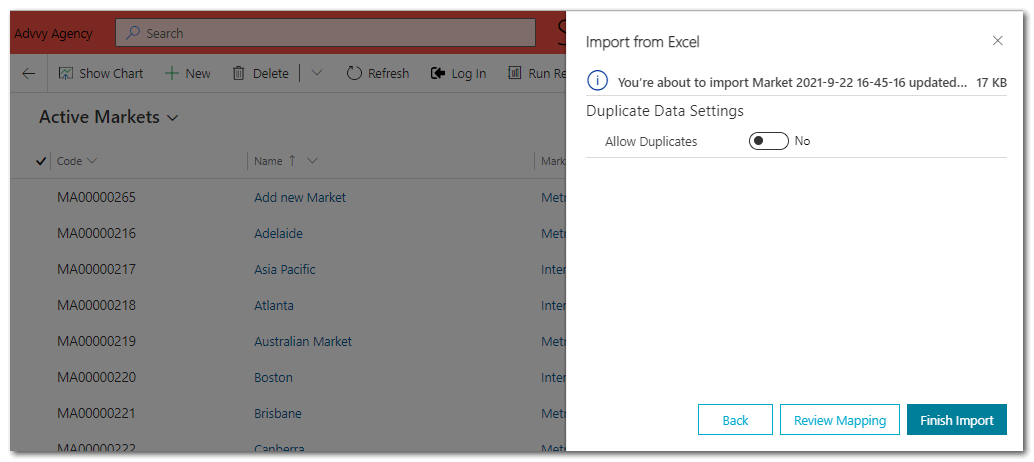
2 Select [Import from Excel] on the ribbon – a sidebar panel displays on the right side.
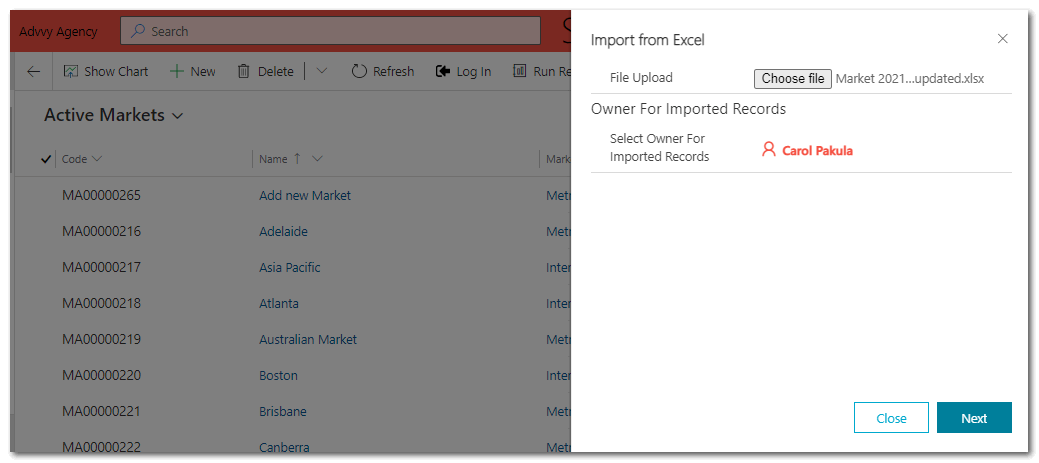
3 Choose the import file and select [Next].
4 Select [Finish Import] – the panel will display ‘Your data has been submitted for import”.
5 Select [Done] to complete the process. You also have the option to Track progress where you will view your import file and its progress.
For more advanced users there is an import wizard available via Advanced Settings, Data Management, Imports
Related Microsoft Documentation: https://docs.microsoft.com/en-us/powerapps/user/import-data