All about Team Groups & Security
Team Groups Overview
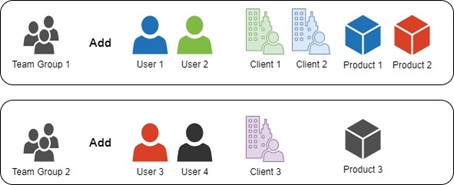
Team Groups are a combination of 3 separate entities – Users, Clients and Products.
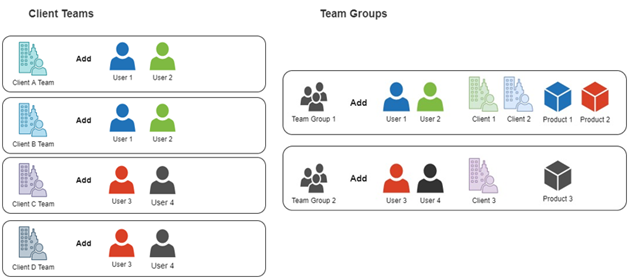
- For every new Client that is added to the system – a corresponding client Team is created automatically.
- Users are manually added to the Client Team to provide them with access to the client’s record and its corresponding campaigns. Alternatively, when users and clients are added to the same Team Group, those users are automatically added to that client’s Client Team.
- Products added to a Client Record are used to signify the focus of the campaign. When products are added to a Team Group, it signifies which products that team is responsible for promoting. Products can be split between multiple Team Groups (if required).
Agencies can continue to use the simple client team structure where users are added/removed for each client team. Alternatively, they can create Team Groups to manage combinations of users, clients and products.
The benefits of using Team Groups are that they allow for more productive client management and a faster assignment of users to a collection of clients and their campaigns.
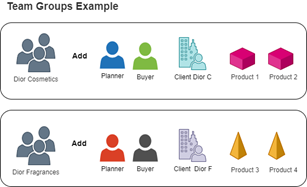
Team Groups are designed to be used to reflect any combination of real-world agency teams – or for an agency team to be segmented into different groups that work on a specific set of clients, or a specific set of client products.
Note: Agencies do not need to create Team Groups if they have no need for an additional grouping structure of the existing Client Teams (Client Teams are created for each new client added in Advvy).
If there are NO team groups specified the Advvy Team Work function will be unusable, and Task Management can still be performed through Advvy Activities Lists. Organisations that choose not to use Team Groups can continue to use the remaining parts of the system.
The latest Advvy functionality “Team Work” is constructed around the use of Team Groups.
Team Groups must contain at least one user, client and product, to appear in the “Team Work” section.
Creating a Team Group
Only Advvy Administrators, or users with a User Management security role can create Team Groups.
- Navigate to the “Agency Settings” area from the bottom-left of the Side-bar menu.
- Select from the sidebar menu under ‘Security’.
This will display the Active Team Groups. - On the page navigation bar, select [+ New].
This will display the ‘New Team Group’ page - Enter a Name for the Team Group, and a Manager or Owner of the team (optional), then select [Save].
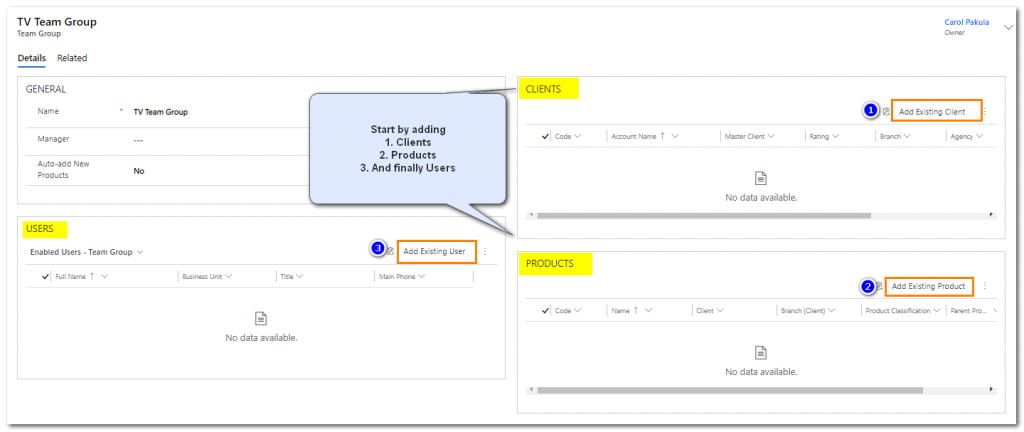
Once the new Team Group has been created Clients, Products and Users can be added to the group.
Order of Population
- Clients – this will direct the available product for selection
- Products – based on the client you can choose to add all products or selected products
- Users – Based on the Client and Product list- adding a User to the team group will adjust their security profile to be visible for this Team Group profile.
It is recommended to populate the team group Clients first, the Products second and add Users last to ensure the Team Group is set up properly before adjusting User access via the Team Group.
Adding/Removing Clients
To Add a Client:
- Select the ‘Client’ grid, and then select [Add Existing Client].
- A lookup window displays on the right of the screen where clients are listed.
Use the search bar to find specific clients for the team.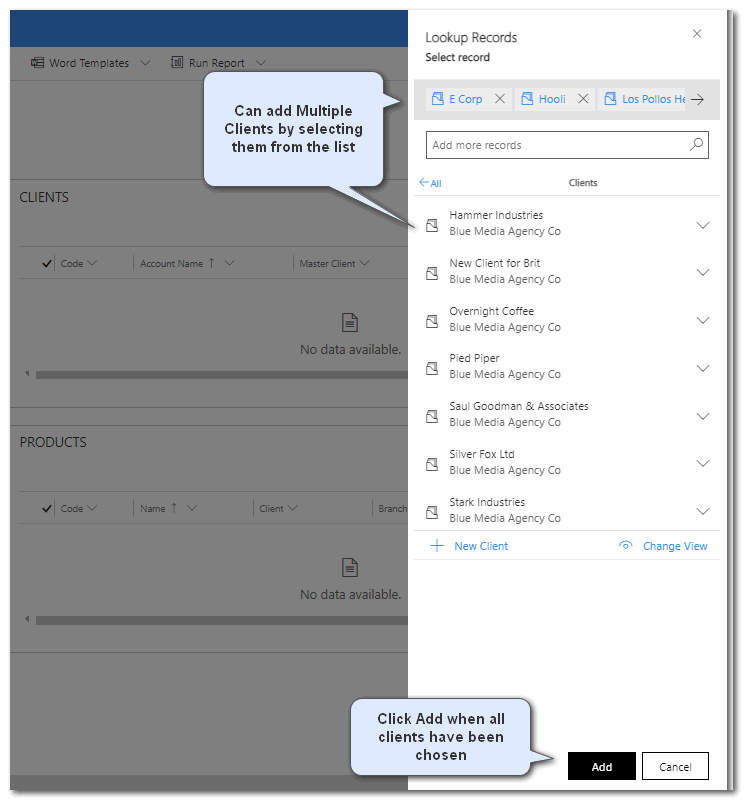
Multiple clients can be added by selecting them- they will appear in the selected line at the top.
Once all clients have been selected, click on the [Add] button at the bottom.
- The Clients will be listed in the client grid.
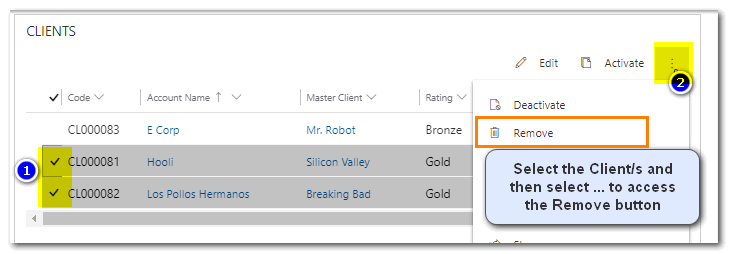
To Remove a Client:
- Click at the start of the row for the client record until a [Check] mark appears and the client record is highlighted. Note: more than one client can be selected and removed in bulk.
- Select [remove] from the menu options.
Adding/Removing Products
To Add a Product:
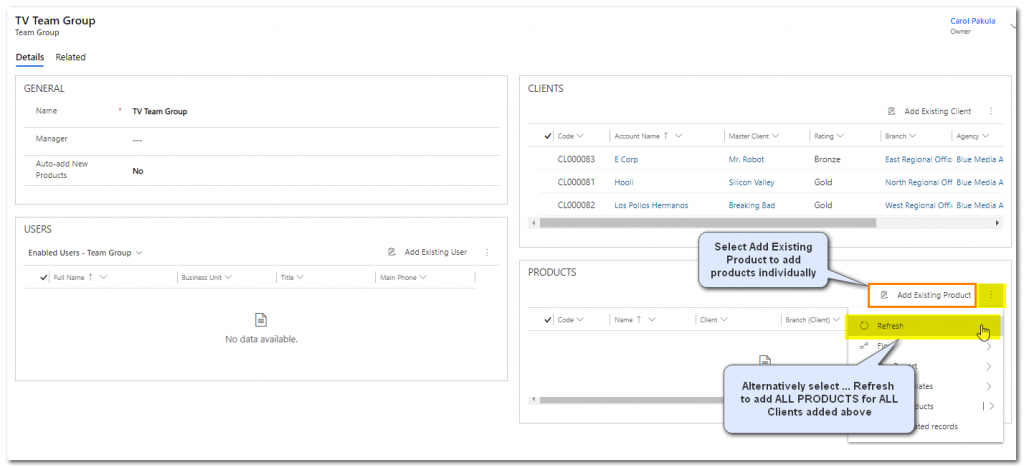
Once clients have been added, you have the option of selecting “Refresh” to add ALL related Client Products to the Team group in one step; alternatively, you can add selected products individually.
To Add ALL:
- in the Products grid select the three dots menu … and then select ‘Refresh”
To Add Selected Products:
- Select the ‘Products’ grid, and then select [Add Existing Product].
- A lookup window displays on the right of the screen where products are listed.
Use the search bar to find specific products for the team.
Multiple products can be added by selecting them- they will appear in the selected line at the top. Once all products have been selected, click on the [Add] button at the bottom.
The selected products will be listed in the product grid.
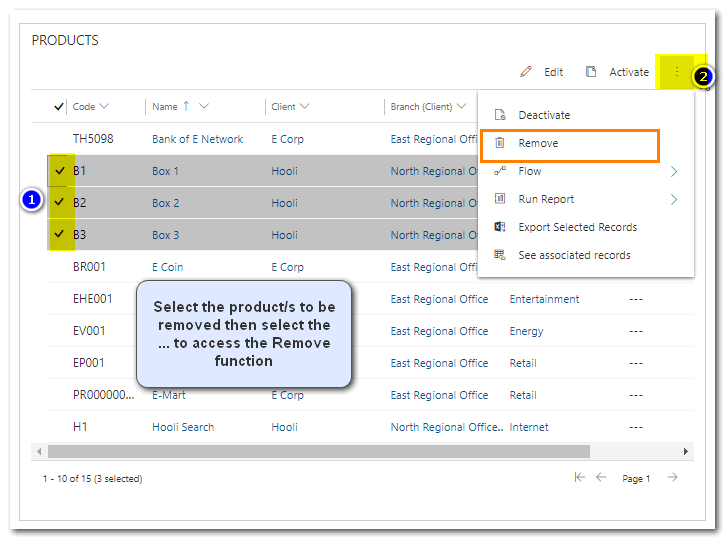
To Remove a Product:
- Click at the start of the row for the user record until a [Check] mark appears and the product record is highlighted. Note: more than one product can be selected and removed.
- Select [remove] from the tab options.
Note about Products, Team Groups and Advvy’s Team Work functionality:
In order to create a Team Group that will appear in the Advvy Team Work section at least one user, client and product must be present within the team group. For this reason, we strongly recommend all three be added to “complete” the team group.
Adding/Removing Users
To Add a user:
- Select the ‘Users’ tab, and then select [Add Existing User].
- A lookup window displays on the right of the screen where users are listed.
Use the search bar to find specific users for the team.
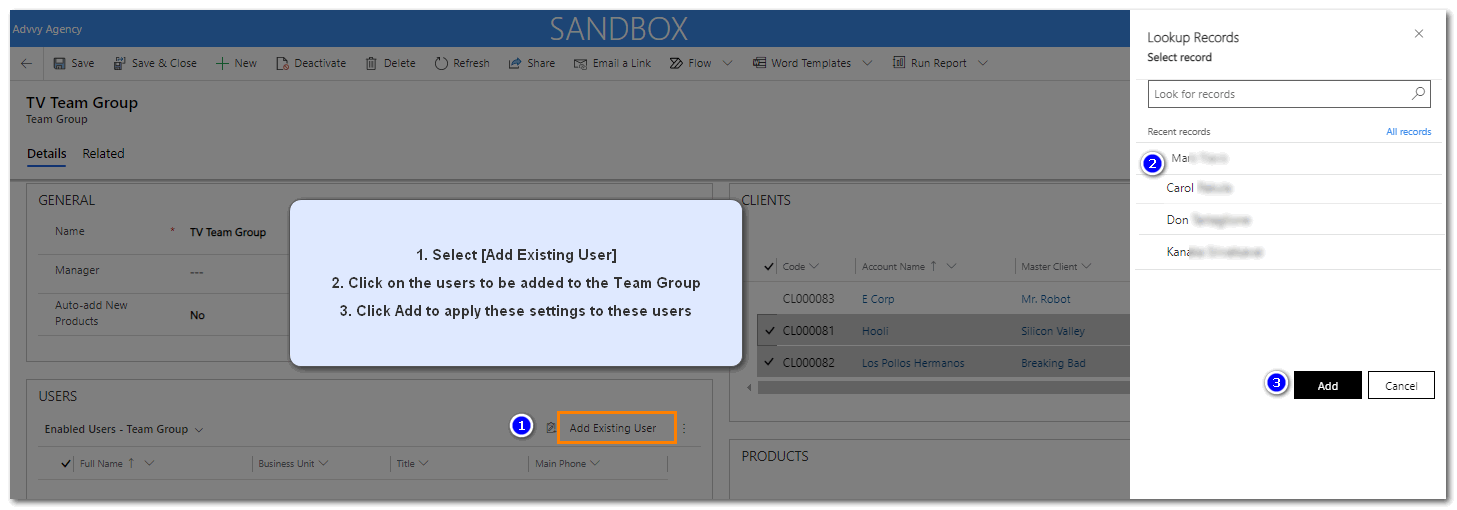
Multiple users can be added by selecting them- they will appear in the User line at the top.
Once all users have been selected, click on the [Add] button at the bottom.
The Users will be listed in the user grid.
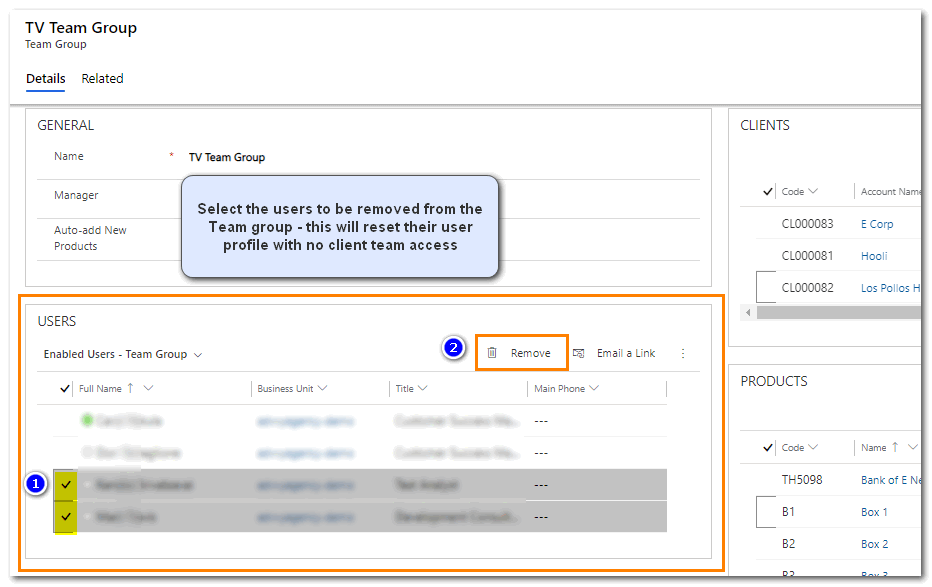
To Remove a User:
ALERT: Removing a user from a team group will remove ALL security access to ALL clients, not only the ones in the Team Group. Since removal of a User from a Team group can significantly change access for that user, it’s best to check the user profile and manually set access to client teams or consider adding them to a different Team group.
- Click at the start of the row for the user record until a [Check] mark appears and the user record is highlighted. Note: more than one user can be selected and removed in bulk.
- Select [Remove] .
Migrating Clients and Users into Team Groups – Tips
- Ensure your client records are up-to-date and include as much Product information as possible
- Consider how your Team Groups will be defined – by Client, by Products, by Manager, etc. This can be as simple as mimicking your team’s current organization.
- Ideally, create enough Team Groups to cater for all Users
- Ensure all Users are assigned to one or more Team Groups – this will provide users with access to the Campaigns created for the clients and products in the Team group. It will also help managers delegate and monitor tasks via the Advvy Team Work section.
Warning for Users not within a Team Group
- Users not assigned to a Team group will still be able to access their campaign records but will not be included in the Team Work views
- Moving a User from one Team Group to another will revoke access to all prior Client campaigns and will only allow access to the current Team Group Clients and Products. This is similar to the Client Team functionality, e.g. if a user is removed from a client team, they’d no longer have access to that client’s campaigns. Remember, the same user can be in multiple team groups
- If a User requires access to more than the clients in a single Team group, additional clients can be added to the users profile manually under the User Management settings